2-22
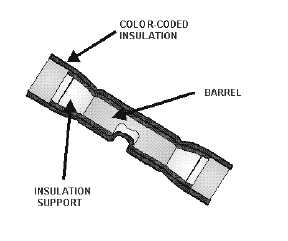
Figure 2-23.—Preinsulated copper splice.
Crimping Procedure for Splices.
Crimping small preinsulated copper splices in the No. 26 to No. 14 wire-size range can be
accomplished with several recommended tools. In this section, we will discuss the basic crimping
procedures.
1. Strip wire to length following one of the procedures already discussed.
2. With the tool handles fully open, set the wire size selector knob to the proper position for the
wire size being crimped. Slide the terminal lug locator down below the die surface into the fully
retracted position. (See figure 2-24.) Slide the splice locator back into the retracted position.
Insert the splice into the tool so that the "locating shoulder" on the side of the splice to be
crimped is in the space between the two crimping dies. The insulation barrel on this side of the
splice should protrude from the "wire side" of the tool. (See figure 2-24.) Slide the splice locator
into the fully extended position. Insert the splice into the stationary die so that the locator
"finger" fits into the locator groove in the splice.